Miniaturizing electronic components allows for the reduction of the size and the cost of customer electronics but ultra small smd mounted electronic components create a problem for electronic experiments and prototyping, in that directly soldering small packages
becomes impractical. The most common solution is to use adapter boards and breadboards instead, however this approach is still quite complicated for beginners. To simplify my personal electronic experiments I created a series of robust electronic bricks which predominantly use the I2C protocol to communicate.
| |
 |
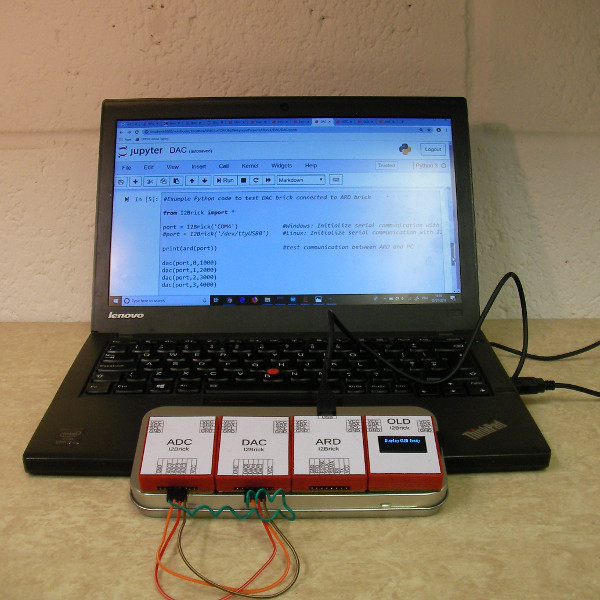 |
The I2Bricks can be directly controlled from any RS-232 terminal. For testing and experimenting on the I2Bricks while they were being developed, the Serial Monitor from the Arduino IDE was used. The description of each brick contains the available serial commands for that brick. Simpler projects can still be controlled by the RS-232 terminal but more advanced projects can be programmed in Python3 using the I2Brick.py library. The recommended Python3 distribution is Anaconda3 running in a Jupyter Notebook. Jupyter Notebook can run Python3 programs, and is a very useful tool for making notes and presentations. The final results can be directly converted into html to present as a webpage. The majority of jabolatorium.com webpages including this one were created in Jupyter Notebook. |